显示标签为“Condor XC-MINI Built-in Power Supply”的博文。显示所有博文

2018年9月4日星期二

How to change the built-in battery of Condor XC-MINI?

Rechargeable battery of XC-Mini is new accessory for Condor XC-MINI key cutting machine,you can buy the chargeable battery and replace it in Condor MINI,then your condor mini can have bulit-in battery.Here is the guide how to change Condor XC-MINI built-in battery.
condor mini bulit-in battery
Remark: please follow the procedure to operation in case of damage the Mainboard ,do not connect the power during operation
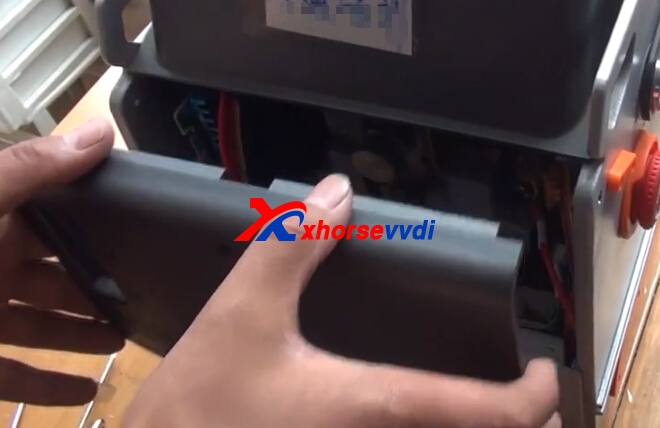
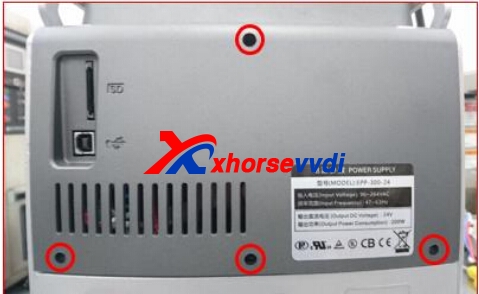
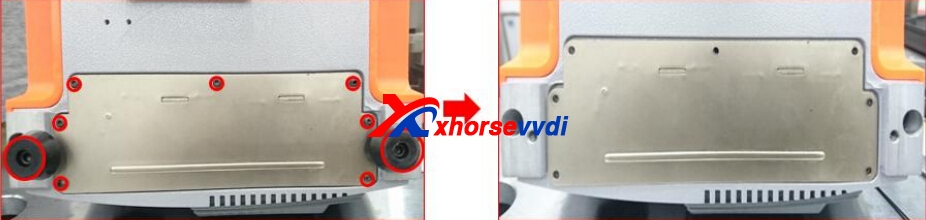
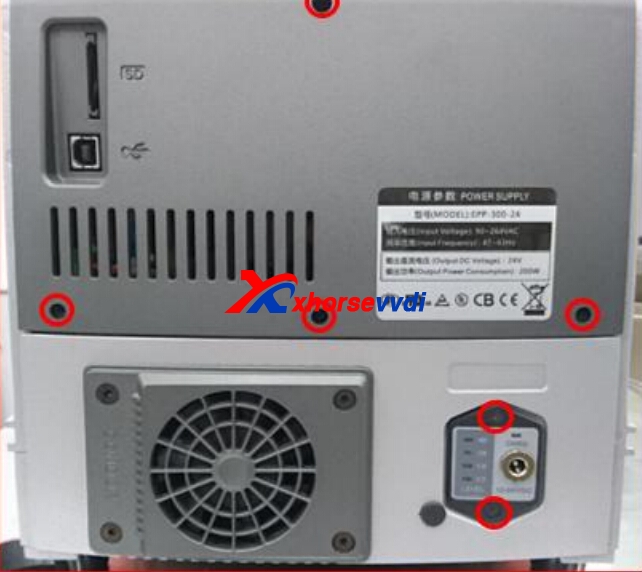
1 , Take off those 4 screws like the picture show
Attention : For your security, do not connect the power in next steps.
condor mini bulit-in battery
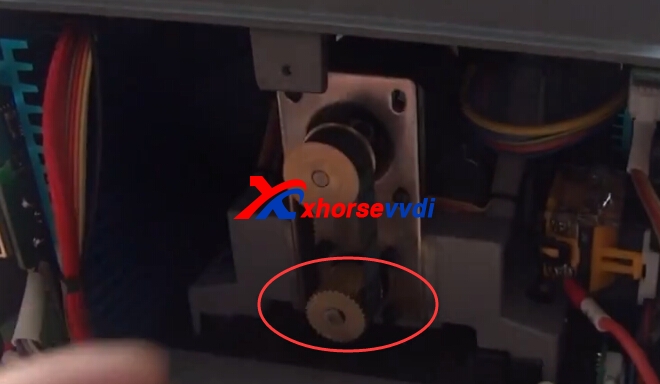
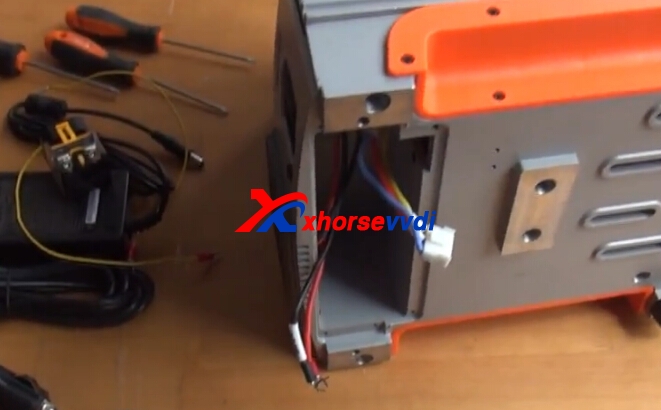
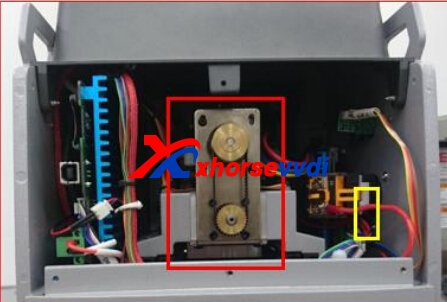
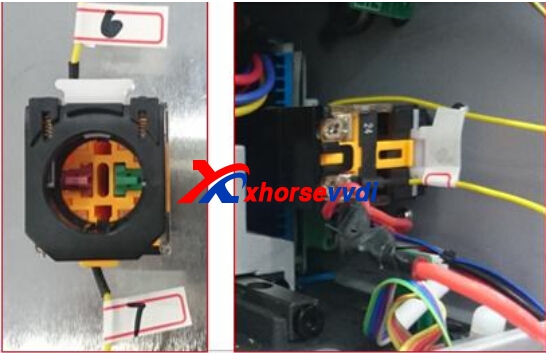
2 , Push the motor inside and hold the white buckle then take out the emergency-stop module like the picture show
condor mini bulit-in battery
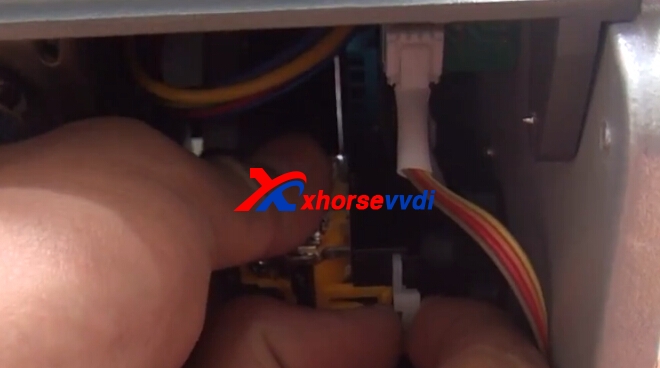
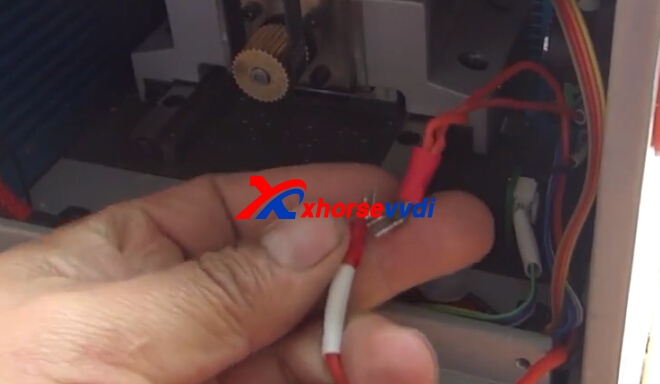
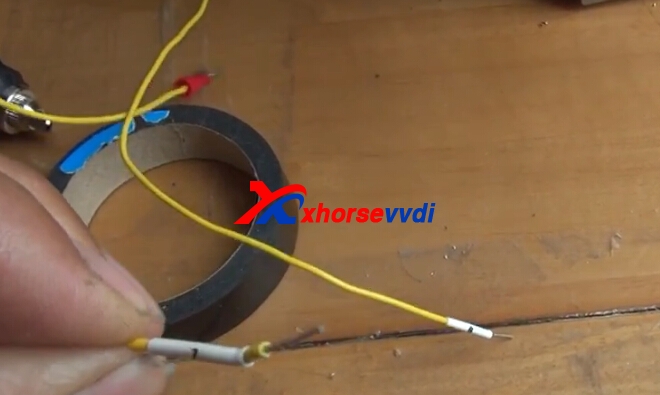
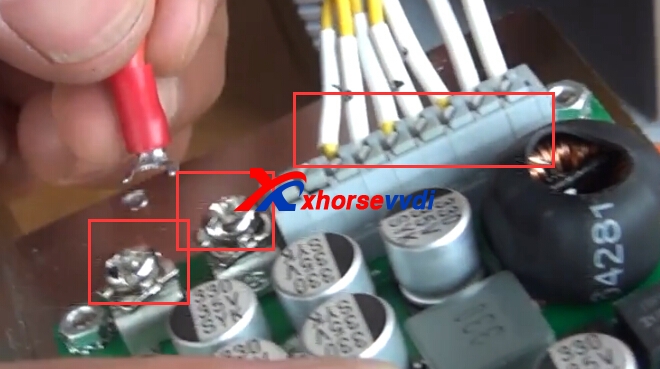
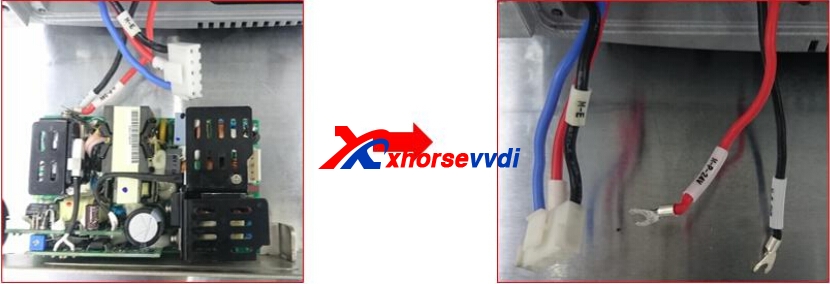
3 , Loose the connection of position 11 &12 like picture show
condor mini bulit-in batterycondor mini bulit-in battery
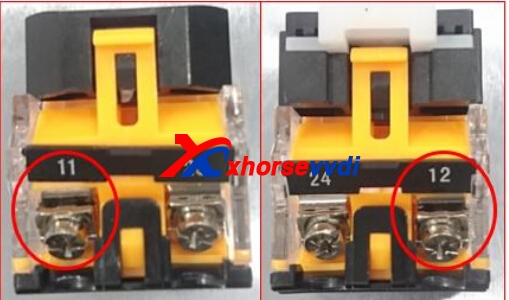
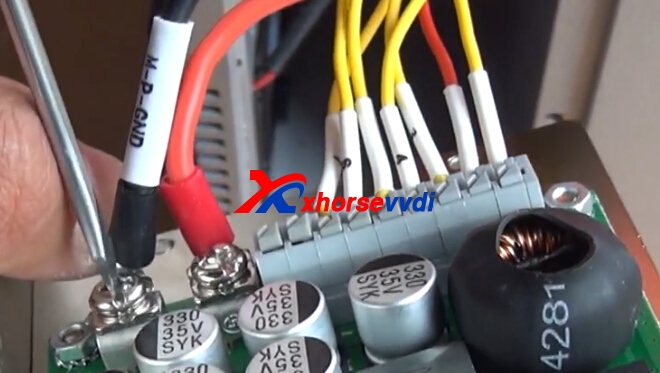
4 , Use a screw to make the connection those two cables what are from position 11 & 12 like the picture show ,and use the acetate tape fix the connection well
condor mini bulit-in battery
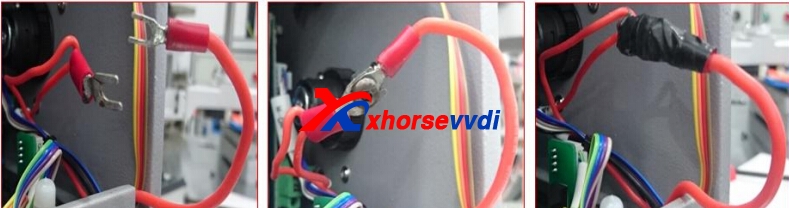
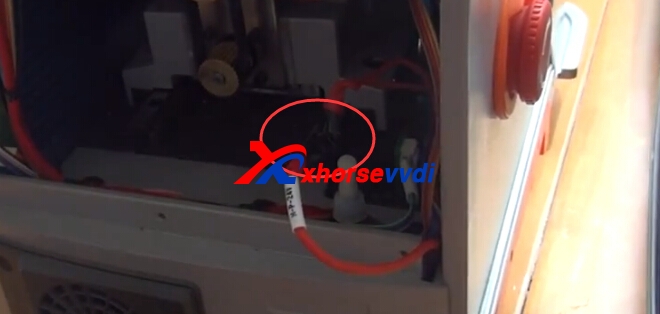
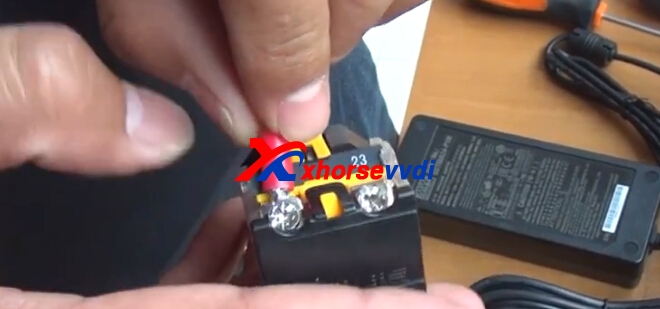
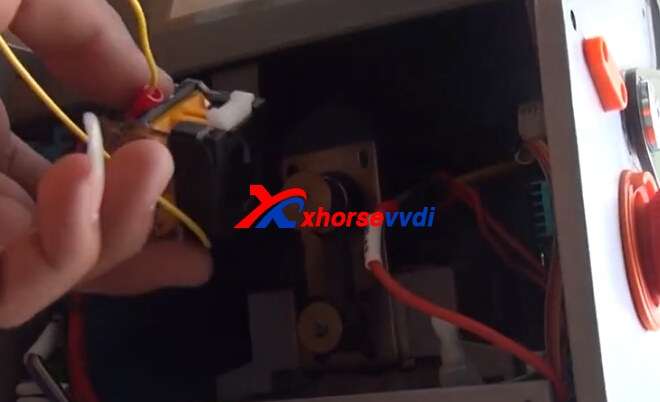
5, Fix the cable 6 to the position 12 , cable 7 for position 11 , then put the emergency –stop module back and fix it well
condor xc-mini battery
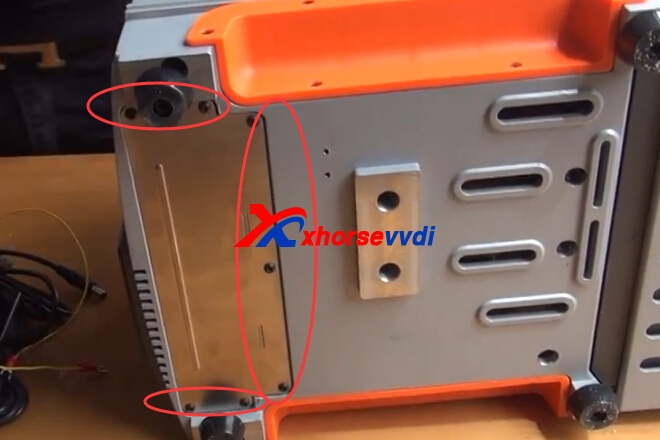
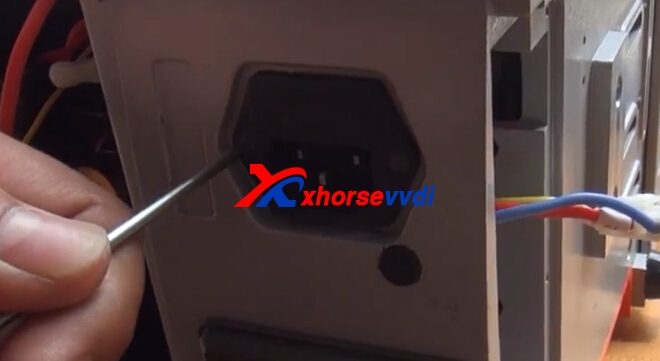
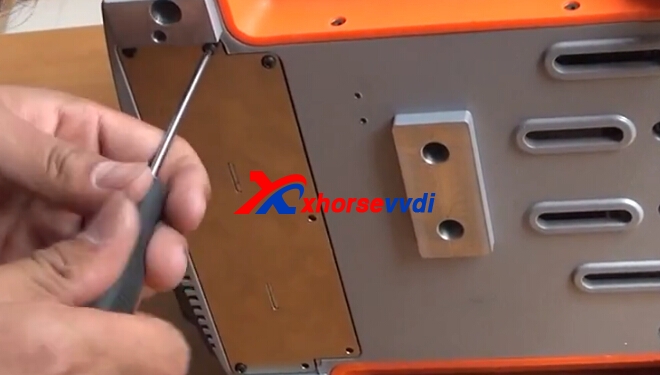
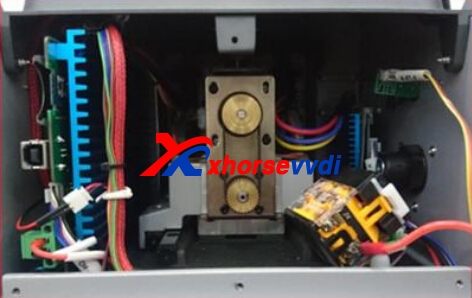
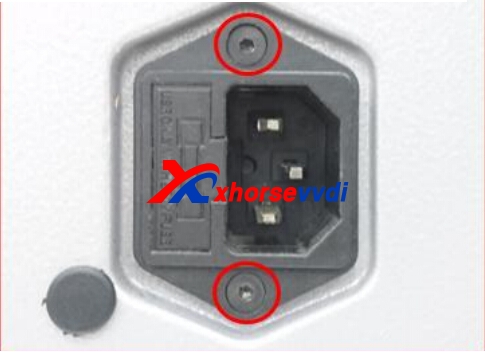
6, Take off those 2 screws like picture show
condor xc-mini battery
7, Turn over the Condor XC-MINI and take off the foot rubber
condor xc-mini battery
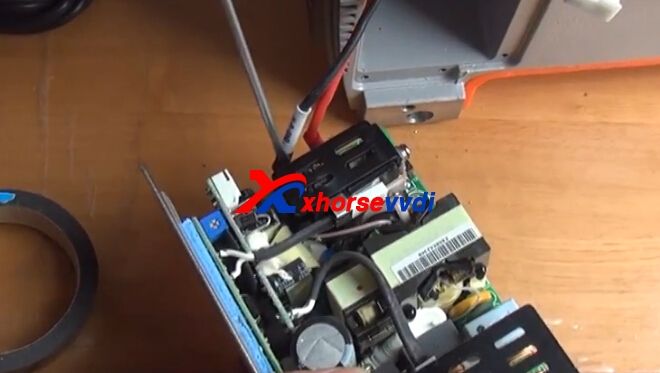
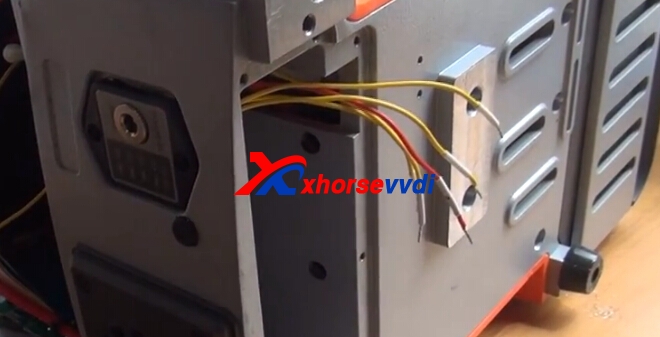
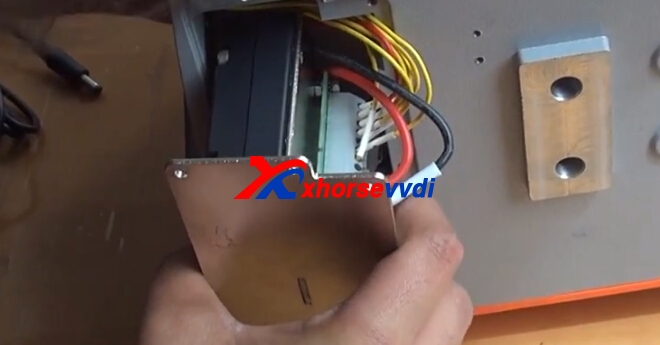
8, Take out the Power-board and disconnect all cables like picture show
condor xc-mini battery
Original Power interface ( 220V)
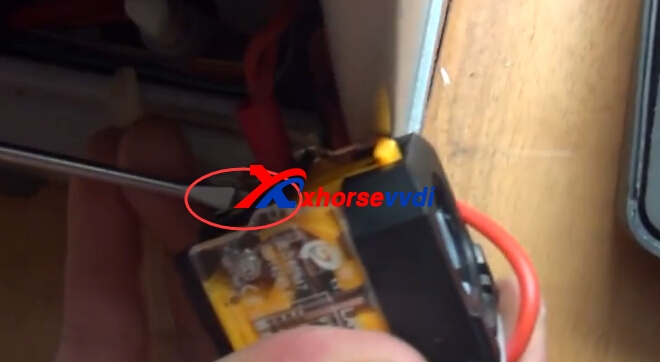
Battery charger & display module
condor xc-mini battery
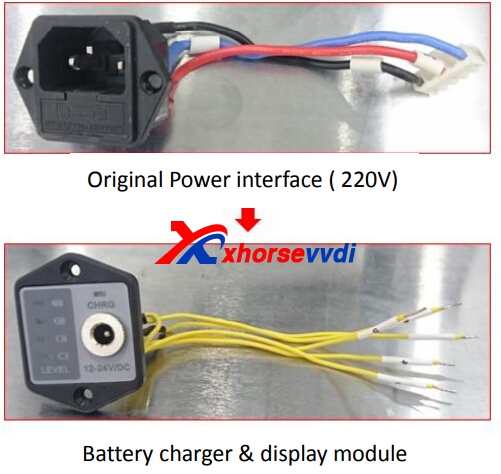
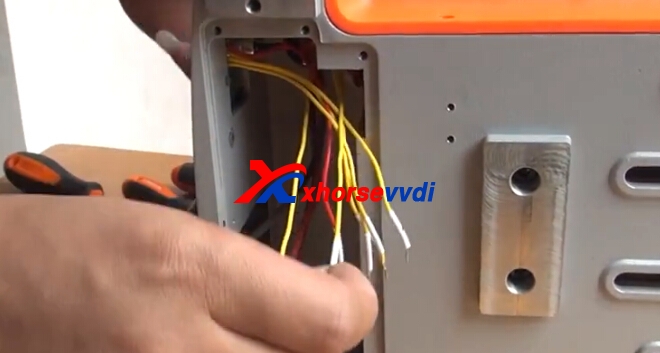
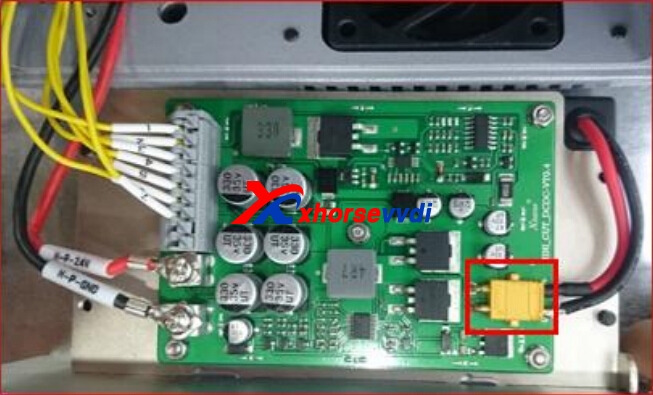
9, Use the battery charger & display module to replace the original power interface like picture show
condor xc-mini battery
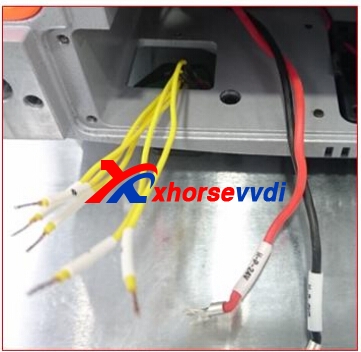
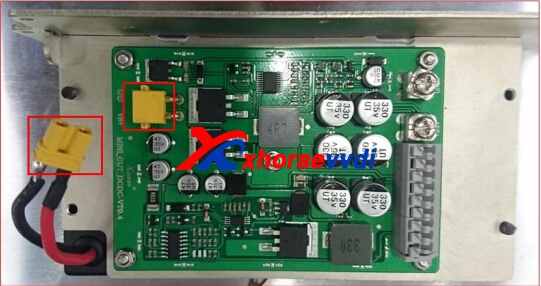
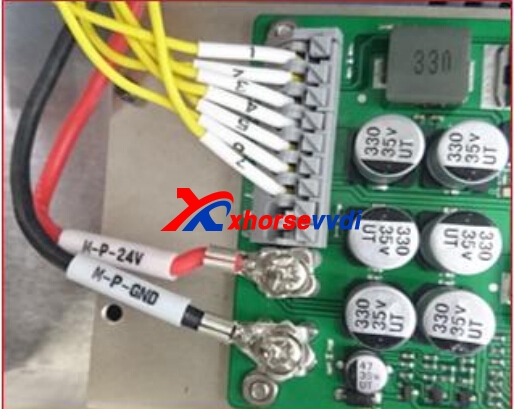
10 , Fix the cable into the socket according the number between the cable and socket ,make sure every cable will be fix well
condor xc-mini battery
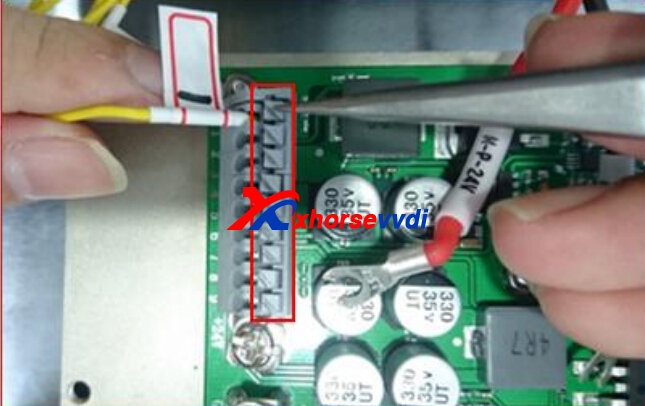
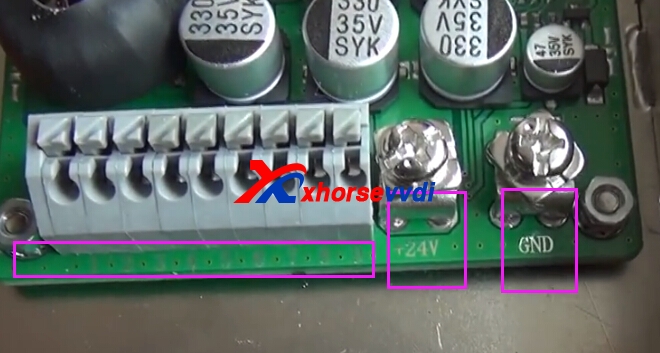
11, Fix the cable of 24V and cable of GND in the right position like picture show
condor xc-mini battery
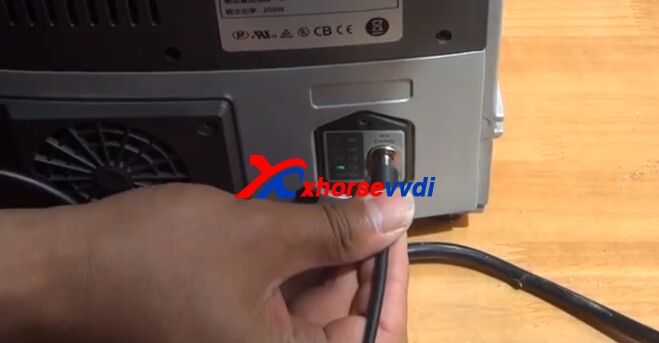
12, Connection the power like picture show then put back the Mainboard and fix it well
condor xc-mini battery
13, Fix the all cables after put back the mainboard , the mainboard should be in fixed very solid ,manage the cables again if not , then fix the foot rubber and screws
condor xc-mini battery
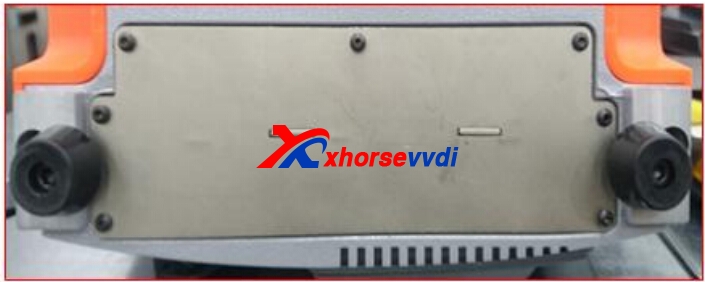
14, Fix those screws like picture show
condor xc-mini battery
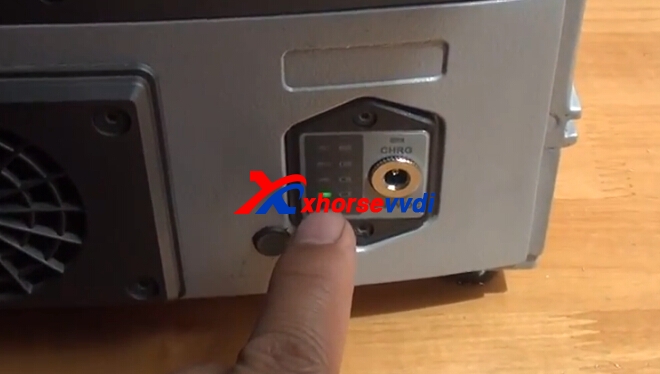
15 , The screen , LED , display of battery charger should be on after you press the emergency – stop button , if not ,check the connection again
condor xc-mini battery
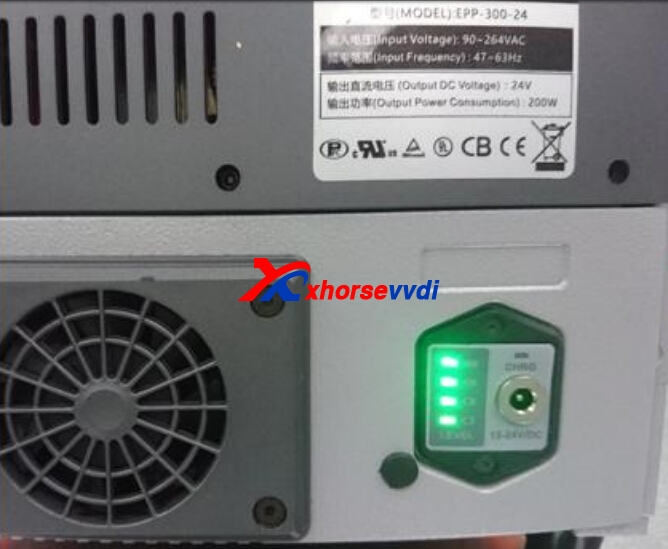
Remark : electricity volume will be show by the green light , the LED that is mark ‘’ CHRG ‘’ should be green if it is charged , it will be red during charging0

Edit by http://www.xhorsevvdi.com/ :How to change the built-in battery of Condor XC-MINI?

2018年5月20日星期日

How to Upgrade Condor XC-MINI Built-in Power Supply?

xhorse condor xc mini is without built-in battery, and now Xhorse releases Power Supply Adapter with Battery Works For Condor XC-MINI, you can update your Condor MINI to built-in power supply one.Here is the detailed steps update condor mini built-in power supply. Firstly please confirm you have Xhorse Power Supply Adapter (With Battery) Kit,you can purchase from XhorseVVDI.com condor mini battery No need to connect Car Inverter, battery as power supply, easy to carry. Support household electricity and cigarette lighter to recharge or use as power supply. Support recharging and working at same time, with high-capacity up to 76.5Wh, cutting more than 40 key blanks. Maximum working voltage no more than 30V, built-in muti-safty protection, to avoid short in circuit problems. How to Upgrade Condor XC-MINI Built-in Power Supply? 1.Remove the screws. condor xc-mini 2.Remove the shell. condor mini built-in power supply 3.Rotate the little round screw to the innermost. condor mini built-in power supply 4.Then we need to remove the clip.Pull it out. mini condor power supply 5.Rotate the screws on both sides,remove out the clip. condor mini 6.Use insulating tape to connect two cables together. condor mini 7.Lay down condor mini machine.Remove the screw. condor xc-mini 8.Take out the board.Unplug the clip. Rotate two screws to remove the PCB. 9.Here two separate yellow color cable,number 7 and 6. condor xc-mini 10.Number 6 cable connects 12 on clip. Cable 7 connects with 11.Lock the screws. condor mini 11.Put back clip to original place. 12.Next step: remove the power adapter on Condor MINI 13.Put the new power adapter.You can find new power adapter in Power Supply Adapter with Battery Kit. Put back screws and lock it. CONDOR XC-MINI 14.Put two yellow cables together with new power  adapter cables under the clip through the hole. CONDOR XC-MINI 15.Connect Power Adapter battery PCB. It lists out number from 1 to 9,and 24V. CONDOR XC-MINI power supply 16.Connect cables to the numbers, VCC and GND. Please note the numbers must be matched. Connect cables,as well as VCC and GND. CONDOR XC-MINI CONDOR XC-MINI power adapter 17.Put back PCB to condor mini.And two shells,lock the screws. Xhorse CONDOR XC-MINI CONDOR XC-MINI CONDOR XC-MINI 18.Now,we power on to start for test.It shows charge capacity. condor key cutting machine 19.Use old charge cable with new charge adapter,connect with power supply,it can charge power. We can also use Car cigarette lighter cable to charge. CONDOR XC-MINI CONDOR XC-MINI 20.Upgrade to the built-in power supply successfully. 21.You can also check our operate video. [embed]https://www.youtube.com/watch?v=1_I-Ywb2gqM[/embed]


original:How to Upgrade Condor XC-MINI Built-in Power Supply?